
Recycled Glass…
a source of raw material
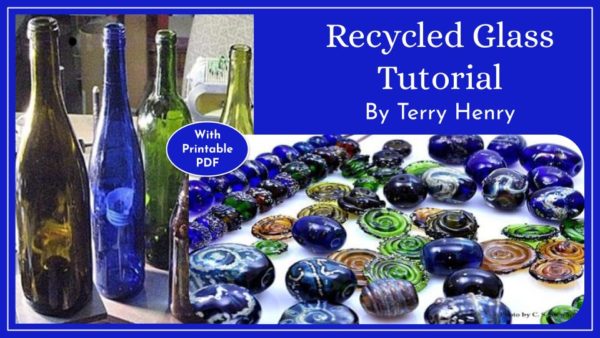
Tutorial by Terry Henry

Recycling can provide raw materials for use in your beads. In this tutorial I am going to share my technique for recycling bottle glass along with surface techniques to create interesting lampworked beads. Materials include bottle glass, filings from recycled silver, silver foil, and commercially made frit.

Any glass bottle will work. Wine and liquor bottles come in a variety of colors and because of their shape are easy to break into long pieces. I have chosen to use champagne, beer and three wine bottles (photo 1). These bottles vary in thickness, which has no effect on melting temperature, stiffness of the glass, or ease of pulling cane.
First, I wash the bottles and remove the labels. For the next steps eye protection is extremely important since once the breaking process begins, glass shards fly everywhere no matter how careful you are. So put your glasses on!

I always begin by scoring my bottles along their length in at least four places with a glass cutter (photo 2). This helps direct the cracking and makes it easier to break a bottle into manageable segments. A hammer and a paper bag require much more effort and create a mess.

Tapping the score lines causes cracks to run down the sides of the bottles. Sometimes the glass breaks in nice long sections although this is not always the case. I work in a box to contain the tiny glass fragments (photo 3). I can’t emphasize enough how important it is to protect your eyes for this step!

It doesn’t take much time to assemble quite a pile of glass (photo 4). I place the glass I am going to pull into my kiln to heat up. Pre-heating the glass reduces “shockiness”. This can be done in a kiln, hotplate, or by strategic placement of the glass below your flame.
Now that my glass is pre-heated, I am ready to melt it and pull some cane. However, because the physical property of my glass is unknown, specifically the *COE, it is important that I do not contaminate my glass by using glass punties.
*COE is the coefficient of expansion. Every glass has this characteristic. Mixing glass of different coefficients can cause compatibility problems and result in broken beads. Soft glass such as Moretti is around 104 COE, borosilicate 32, and bottle glass could be anything. Each bottle should be considered to have its own COE. A good resource on compatibility can be found at the Warm Glass website.

I use metal tools to pull the glass into rods so there is no opportunity for contamination. I use a hemostat to grab pre-warmed glass from my kiln and heavy metal mandrels or chopsticks as punties.
My favorite tools for this task are hemostats and 1/8-inch mandrels.

While holding a piece of glass with a hemostat I heat up a mandrel to glowing red hot along with a corner of the glass shard. I can then insert the mandrel into the glass. This will support the glass while it heats up (photo 6).

Eventually a second mandrel is heated and inserted into the glass to provide support. I find
twisting this mass in opposite directions helps wind the glass together as it melts into a gather
(photo 7). Some glass develops a white surface that looks similar to devitrification; however, it
goes away as the glass becomes molten.

Once the glass is molten, trapped air starts to form bubbles. Continued heating helps to eliminate these bubbles. Bottle glass is much stiffer than “soft” glass and takes more heat over a longer time before it gets drippy. Once the gather is glowing red and beginning to flow it is ready to pull (photo 8). I take my gather out of the heat once it starts to flow and wait a bit before I start to pull. This gives me more control over the glass. I start slowly and if my rod begins to thin, I slow down, blow on the thin spot to cool it, and continue to pull.

If my pull is uneven, I will cut off the uniform portion in the center leaving the thicker ends on their punty, to be reheated and pulled again. It doesn’t take much glass to accumulate quite a bit of cane (photo 9).
Surface Decoration Techniques
Ok now you have all this cane the color of bottles with most of it in the green to yellow green to brown ranges with maybe an occasional blue color here and there. It is pretty boring and by itself it might be good for spacers. You can’t mix the colors together without the risk of cracking beads. So, I mix bottle glass with components that won’t affect its COE, like metals. I am going to discuss a few options for transforming plain bottle glass into stunning beads using silver.

Silver Filings:
Let’s stay with the recycled material theme for our initial surface treatment method. Fine silver scrap filings can be applied to a gather of hot glass (photo 10).

The filings are coarse when pulled and result in a lumpy and brittle cane that is hard to apply. To solve this problem, I combine silver rich stringers with a cane of similar glass and create a twist (photo 11). This adds more glass to the silver and makes it easier to work with. These twists can be applied to a base bead, melted it in, and reduced the bead in a propane rich flame to yield a design.

The beads in photo 12 are made using silver twists from silver filings applied to blue bottle glass. These beads are truly from recycled materials as the silver applied to the beads was recycled from silver recovered from exposed x-ray film in the 70’s. Filings from “baked” silver clay (PMC) would work well for this purpose as well. Too much silver can cause surface pitting so use it sparingly and never use sterling silver, which turns black.

Silver Foiled Stringer
Silver foil can be used to make silvered stringers that are then applied to the surface of a base bead of like glass. Heat a gather of glass and roll it into a strip of foil (photo 13).

Burnish the silver around the glass gather while the glass is still hot (photo 14).
This will prevent the foil from burning off. Return the silvered gather into the flame and heat it until it is ready to pull into a stringer.

Photo 15 displays beads decorated with silvered stringers made from foil. I drew a design on the center bead and simply wrapped the other beads with a stringer. The blue color is developed as the silver is heated in the flame. The silver will turn metallic in a reducing flame (less oxygen/more propane).

Burnished Silver
The next surface technique involves decorating a base bead with a raised design. Dots, stringer work, or anything that leaves the surface raised. The bead in photo 16 was decorated with a stringers and dots. The glass is the same as the base bead.

Silver foil is applied directly over the stringer work and then burnished into the raised design (photo 17). The bead is placed back into the flame. Because the decoration is at a higher elevation than the base bead, the foil is only in contact with the raised design not the entire bead.

This causes the silver to concentrate onto the raised design (photo 18). Once the bead is re-introduced back into the flame silver that is not in contact with glass burns off and may fume onto adjacent glass. This effect is increased as the design is melted into the bead.

Reducing the bead really brings out the silver effects. As with the other techniques the reduction causes the silver to become metallic.

Photo 20 is the finished bead with silver concentrated on what was once a raised design. The area next to the silverwork shows the effects of silver fuming. The blue color is not the base color of the glass. The base glass used for the beads in photo 20 is amber/brown and green.
Surface Decoration Using Frit
Frit provides numerous options for decorating beads made from bottle glass however this must be done with caution. Any frit that is used should be close to the COE of the base glass or it will pop off or cause the bead to crack. And frit should be used sparingly. A general rule is that the frit should not make up more than 5% of the bead.

The application of frit to beads made with bottle glass is no different than that of any other glass. A hot base bead is rolled in frit and reintroduced into the flame enough to adhere the frit onto the glass. I used Val Cox Dark Iris Gold frit, COE 96, and then reduced the bead to bring out the metallic properties of the frit (photo 21). The larger beads in the lower right-hand corner of photo 21 were decorated with stringers pulled from the frit.

There are many unexplored techniques to try. I would like to play with copper leaf, gold, and reactive frits. Every recycled glass has its own characteristics depending on its chemistry. Recycled glass provides opportunities to explore unique and unknown results. Photo 22 is a Chaos bead after Sherry Bellamy using the amber/brown glass of a beer bottle. The center glass is cased in a silvered stringer, reduced, and covered with copper mesh on the right and cut on the left, then cased in the same beer bottle glass. Pretty cool for an old beer bottle from the recycling bin!
Recent Comments